Kubernetes cluster on ARM using Asus Tinkerboard
Jan 14, 2018Over the winter holiday break of 2017, I’ve spent some time playing with Kubernetes on ARM. I had a lot of fun building this beast:
Ok, I've got #kubernetes running on 4 nodes Asus Tinkerboard ARM cluster with ARMbian (with some ultra-advanced cooling), and it's a beast! Oh, did I mention it runs @openfaas like a champ?
— Karol Stępniewski (@kars7e) January 2, 2018
Blog post incoming! pic.twitter.com/CiqnSPiPb7
I finally found some time to write about it in details. Let’s go!
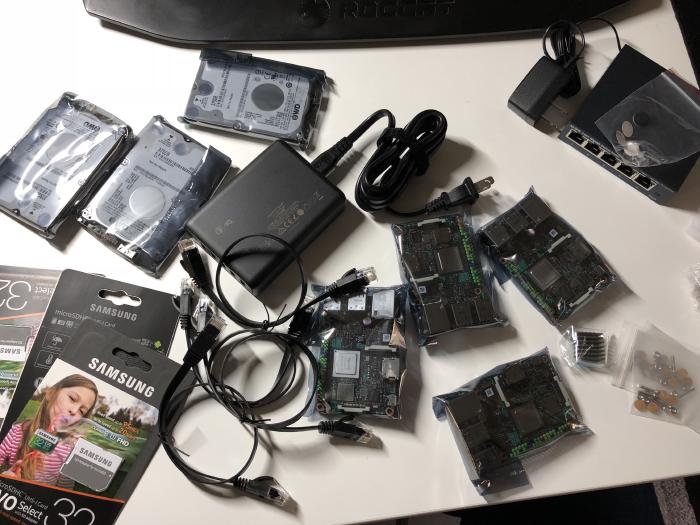
Shopping list
The most popular choice for ARM cluster is of course Raspberry Pi, well-tested board with a huge community. I’ve decided to use something else for my cluster, and I picked Asus Tinker board. The most important differences:
- 2GB of RAM (compared to 1GB in RPi)
- Gigabit Ethernet (compared to 100Mbit)
Twice the amount of memory will come very useful when running a larger number of containers (no surprise here, bigger is better!). Since I want to expose persistent volumes to Kubernetes pods via NFS from my Synology DS 218+ NAS, the Gigabit Ethernet will definitely improve that experience.
Here is the complete list of required components:
| Part | Price | Quantity | Sum |
|---|---|---|---|
| Asus Tinker board | $59.45 | 4 | $237.80 |
| 16GB SD Card | $9.97 | 4 | $39.88 |
| Anker 3A 63W USB Charger | $35.99 | 1 | $35.99 |
| 1ft microUSB cable, set of 4 | $9.99 | 1 | $9.99 |
| 8 Port Gigabit Switch | $25.32 | 1 | $25.32 |
| Cat 6 Ethernet cable 1ft, set of 4 | $8.90 | 1 | $8.90 |
| RPi stackable Dog Bone Case | $22.93 | 2 | $45.86 |
| Arctic USB Fan | $4.12 | 1 | $4.12 |
| WD PiDrive 375GB | $29.99 | 4 | $119.96 |
| $527.82 |
Woah, a whopping $527.82! Well, no one said it’s a cheap hobby… but you can make it less expensive. For example, you could reduce the number of nodes to 3; this will cut the cost by $100 (and a 3-node cluster is still kick-ass!). You could also remove the PiDrives. I’m using them as a mount point for /var directory, which will hold logs, and most importantly, docker container file system. These tend to be write-intensive, and storing them on SD card may result in a much shorter card lifetime, so it’s your call (you might need a bigger SD card if you decide to go without PiDrives). Finally, you could change Tinker board to some cheaper board, even the previously mentioned Raspberry Pi… but this post is about deploying Kubernetes on Tinker board and switching to a different board will make the rest of this post useless for you :-).
There are two differences between the list above and the actual parts I’ve used:
- I swapped 32GB SD card I’ve used in my build with 16GB - you don’t need that much space if you are using external HDD.
- I’ve used 5-port gigabit switch instead of 8. However, now that I’ve assembled everything, I saw I might have made a mistake - I’ve used all the ports, with no room for expansion! The 5-port switch has one nice advantage; it fits nicely on top of the case. It’s up to you!
NOTE: Make sure the charger you use can deliver at least 2.5 Amp per USB port. 3 Amps are preferred. Tinker board needs more current than Raspberry Pi, and also that single port will be used to power both disk and the board. The Anker Charger I’ve included in the list can squeeze out 3 Amps per port, so you’re covered.
Assembling
We’ve got all parts. Let’s assemble them!
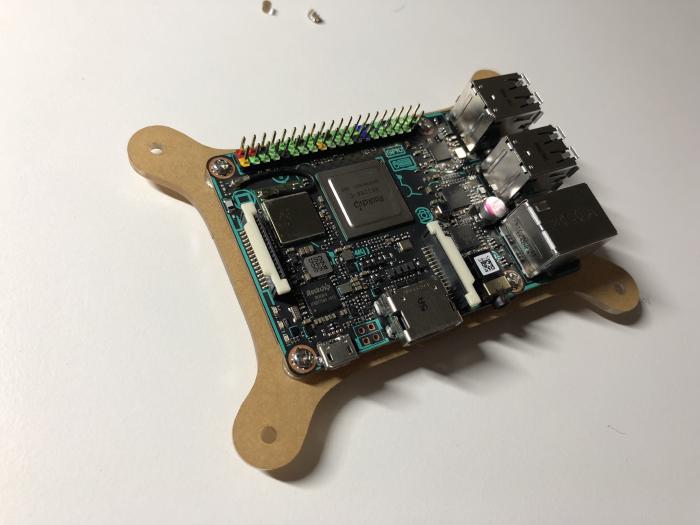
I’ve started with Tinker board and RPi stackable Dog Bone Case. Tinker board is fully compatible (size-wise) with Raspberry Pi, so I thought it could not have been easier. The first time I used the washers, however, I used them in the wrong way… (hint: they are supposed to go between the board and the case, as spacers, to ensure proper space left for the bottom side of the board). Make sure you attached the heat sink to the CPU before you mount another layer - once you mount it, it will be very hard to attach the sink. Tinker board tends to heat much more than RPi. In fact, I’ve added even more cooling; I will come back to that soon.
I knew that RPi stackable Dog Bone Case would fit Tinker board as well, but I had no idea about the drives. In fact, they are much bigger, and screw holes in drives do not match much those in the case (not to mention they need completely different screws). So… double-sided tape to the rescue! I’ve taped the disks to the case layers, and the result was very satisfying.
Now it’s time to connect disks and Tinker boards. The idea is simple - the micro USB cable goes from the charger to disk via another cable included with the disk. This cable is then connected to the board twice - once via micro USB (to supply power), and once via USB-A (for data). The USB cable is quite short, so make sure it fits well before securing the two cases together!
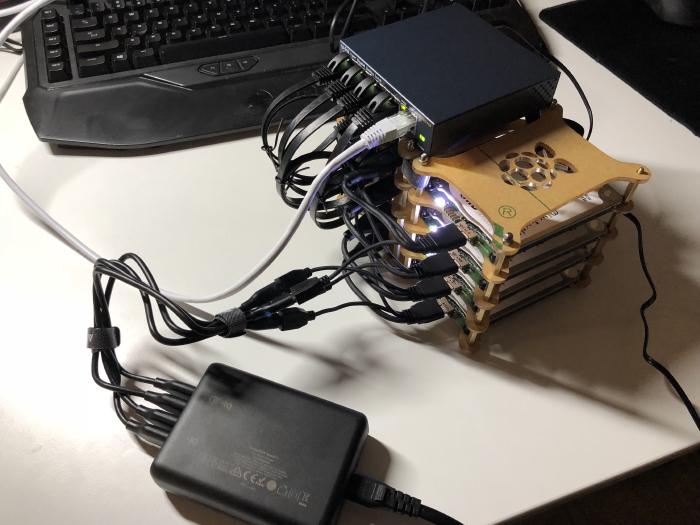
Once both cases (the case with boards and case with disks) were fully stacked, I’ve “secured” them together using velcro ties that came with micro USB cables.
I mentioned that these boards tend to heat quite a lot. In fact, after I deployed Kubernetes and kept them running for some time (without any additional workload), the temperature went up to 60-65C. I figured that’s too much, especially that I wanted to store the cluster in a closet without much air ventilation. I ordered a $4 Arctic USB Fan and used the last remaining USB port in the charger for it. The result? the average temperature dropped to 35-40 degrees!.
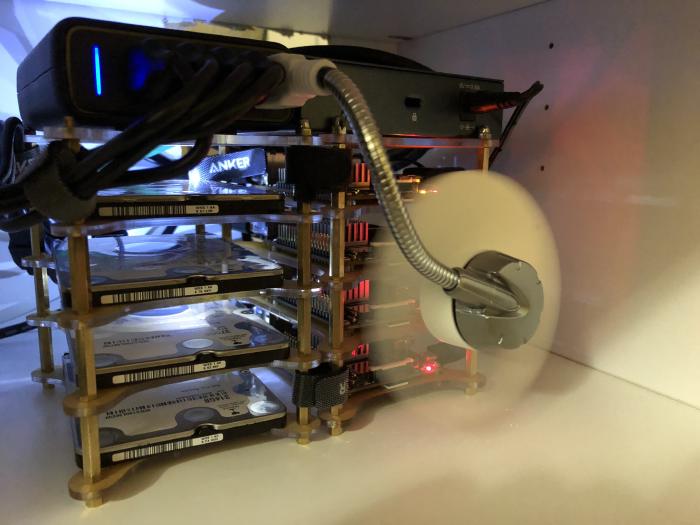
Woop, woop, our Cluster is ready for containers!
Imaging & First boot
… But first, we need to prepare our SD cards with an OS image. I’ve used Armbian with great success. Head over to https://dl.armbian.com/tinkerboard/ to download the image. I’ve used nightly Ubuntu Xenial mainline build. The thing is… this image is no longer available. It looks like there is Ubuntu Xenial Next Desktop available. However, this image is much bigger as it includes the desktop bits. If that’s ok for you, feel free to use it. The currently available server image is from 2017-10-18, which is too old and does not include this fix. If you don’t mind downloading images from random internet locations, here is the image I’ve used, uploaded by me. I’m also in the process of building my Armbian image following this guide to have a customized kernel and all the great goodies useful for Kubernetes - I will update the article once the image ready and well tested.
NOTE: The rest of this guide was tested using the nightly image available here. Make sure you use this image to have smooth sailing!.
Now it’s time to “burn” image to SD card. Armbian recommends Etcher, I can wholeheartedly recommend it as well. It’s straight-forward, multi-platform, and it simplifies the multi-card burning process.
Once all the cards are ready, it’s time to boot your cluster for the first time!.
Before moving forward with configuration, you have to log in to each board via SSH (or use monitor/keyboard) as root, with password 1234. The first login will require you to change the root password and set up non-root account.
While you are logged in, there are two steps that you can do here (everything else we will automate, I promise!) on each of the boards:
Make sure networking will not get borked after you reboot
It seems to me that there is an issue between /etc/network/interfaces and NetworkManager, both trying to claim ownership of networking card. I’ve resolved that issue by
ensuring NetworkManager is the winner - just run cp /etc/network/interfaces.network-manager /etc/network/interfaces, which will basically remove all interfaces from this file.
Format and mount the PiDrive (skip if not using PiDrive)
Run cfdisk /dev/sda to create new Linux partition, run mkfs.ext4 /dev/sda1 to format it as ext4 file system, and finally add UUID=e4ea132a-2f0f-418c-928a-c3d0503c6b44 /var ext4 defaults,noatime,nodiratime,errors=remount-ro 0 2 to /etc/fstab (You can find the uuid of the disk by running ls -l /dev/disk/by-uuid/ | grep sda1 or blkid /dev/sda1 | awk '{print $2;}'). Finally, run the following sequence of commands:
cp -a /var /var.bak
mkdir /var
mount /var
cp -a /var.bak/* /var/
reboot
rm -rf /var.bak
The above will ensure that your /var directory is using PiDrive, and that its current content is copied over.
That was a lot of manual work, yuck! But from now on, we will automate all the things!
Preparing OS
There are still few things we want to configure on our boards before we can install Kubernetes. Updating packages, installing dependencies, and so on… but we will do that all using Ansible. Make sure you have ansible installed before proceeding (you can find install docs on Ansible website). One more thing to do before running ansible: configure your SSH. First, copy your public key to all nodes: ssh-copy-id -i ~/.ssh/id_rsa YOUR_USERNAME@tinker-0 for each of the nodes. Ensure your ~/.ssh/config has following lines:
Host tinker-0 tinker-1 tinker-2 tinker-3
    User YOUR_USERNAME
and finally, log in to each of the nodes, run visudo, and make sure the following line is there:
%sudo ALL=(ALL:ALL) NOPASSWD:ALL
The above will make sudo passwordless, and your ansible will run smoothly.
Here is the playbook that will get you the fully working Kubernetes cluster. Just make sure you have an inventory file, like this:
Note: the above file assumes that your cluster nodes are accessible via their hostnames. if your DNS does not provide that, add ansible_host=192.0.2.50 to each entry in first four lines of the inventory file, replacing the IP with the correct one.
Then run it like this:
ansible-playbook -i inventory.ini configure.yml
And Voila! OS on all nodes is ready for Kubernetes installation. So what did this playbook do? You can, of course, look into the source, but let’s mention some notable tasks here:
- Configures hostnames across all nodes
- Reconfigures machine id (needed as all nodes are started from the same image)
- Disables Wifi
- Upgrades packages and install NFS dependency
- disables zram and swap
- Installs Docker
Installing Kubernetes
This step couldn’t be simpler. Just run:
ansible-playbook -i inventory.ini kubernetes.yml
That’s it; now you have fully functional Kubernetes 1.9 cluster!
Under the hood, it uses kubeadm to provision the cluster. If anything goes wrong with Kubernetes installation, just run:
ansible-playbook -i inventory.ini k8s-reset.yml
It will bring the nodes back to the state before Kubernetes was provisioned.
Installing OpenFaaS
Before installing OpenFaaS, make sure you have kubectl installed (brew install kubernetes-cli on macos), and you have it configured (Copy /etc/kubernetes/admin.conf from your master node to ~/.kube/config). Once you have the above, just run:
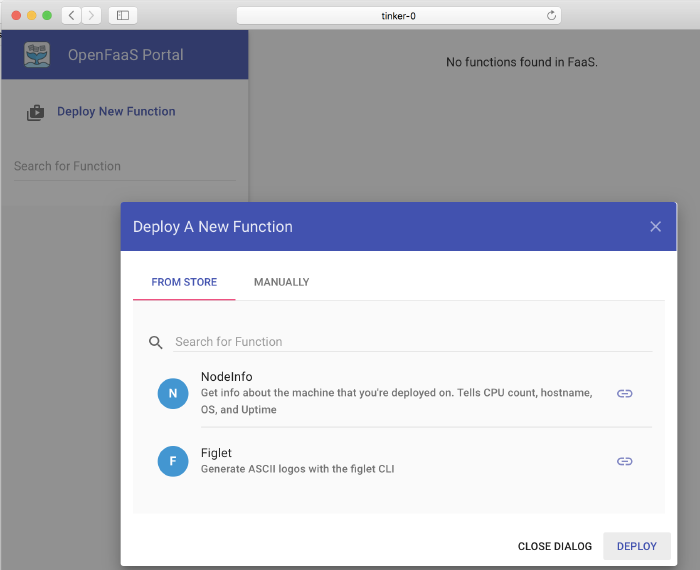
You can retrieve the URL for OpenFaaS UI running following command (replace tinker-0 with your node’s hostname or IP):
To get something like this:
http://tinker-0:31112/ui
And you should be good to go!
Feel free to let me know how did it go for you or if you have any questions. You can do it via comments or Twitter.
Until the next one!